Reporting and Integrations
Wilhelmina Aumann and Dylan Watkins' Project
The first part of this project explores the depth of the reporting tools in Salesforce.
If you are already familiar with navigating the RAMS org interface, you may skip the first chapter.
The second part of this project will produce a Proof-of-Concept integration with one or more third party services. At this time, this part is in the exploration stages. I expect to use Apex and Callout features in Salesforce to link to our GiveCampus sandbox API.
- Configure Org Nav Bar
- Build First Report (Demo)
- Build First Report (Definitions & Notes)
- Summarize in Reports
- Advanced Report Filtering
- Advanced Report Grouping
- Advanced Report Formulas
- Final Notes on Reporting
Configure Org Nav Bar
Welcome to RAMS!
Upon logging in, you will be redirected to the Salesforce org home screen.
It may look slightly different from this early version, but the core functions will be the same.
Navigating to Reports
There are two ways to reach the Reports tab.
- App Launcher

- Nav bar shortcuts, such as

You can find both of these methods on the top white strip of your screen.
By default,  is not included on the nav bar.
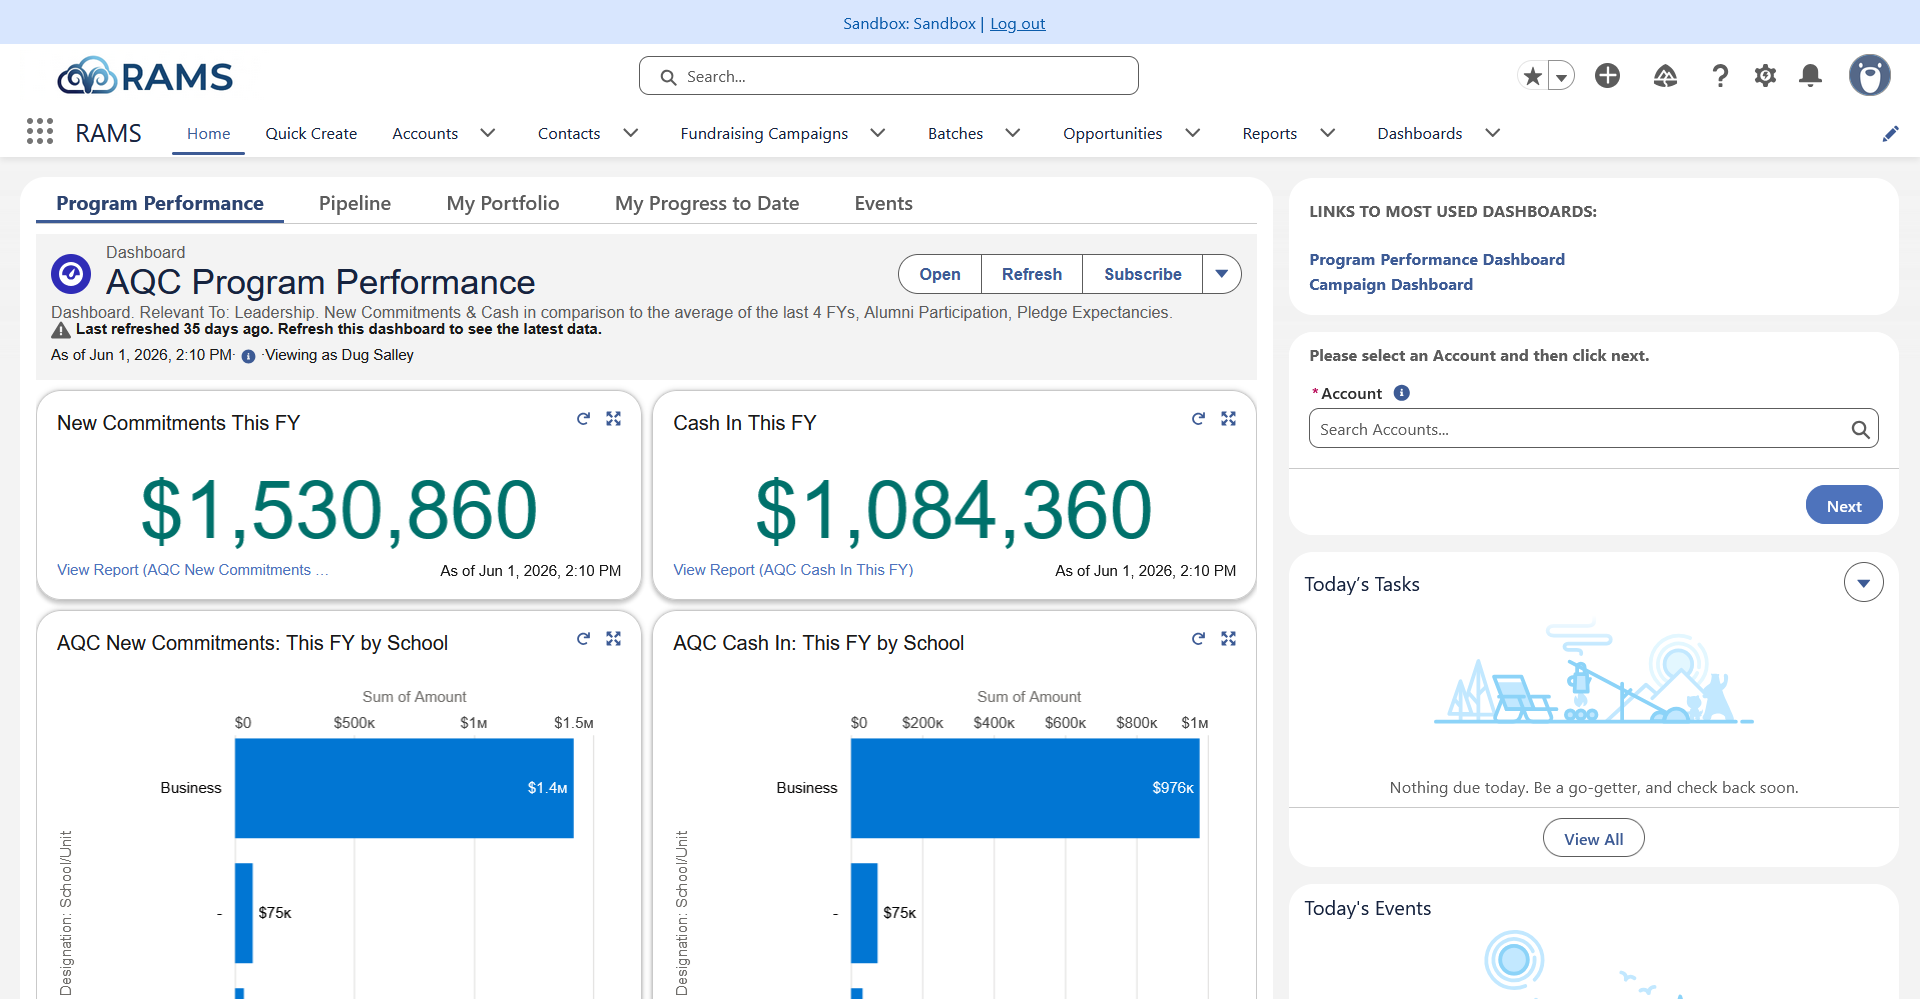
Sandbox version with sample data
Using the App Launcher
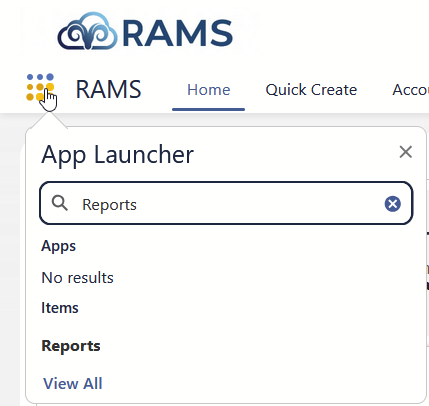
To use the App Launcher, click  and enter a term in the search box.
Click Reports to see all reports and report creation tools.
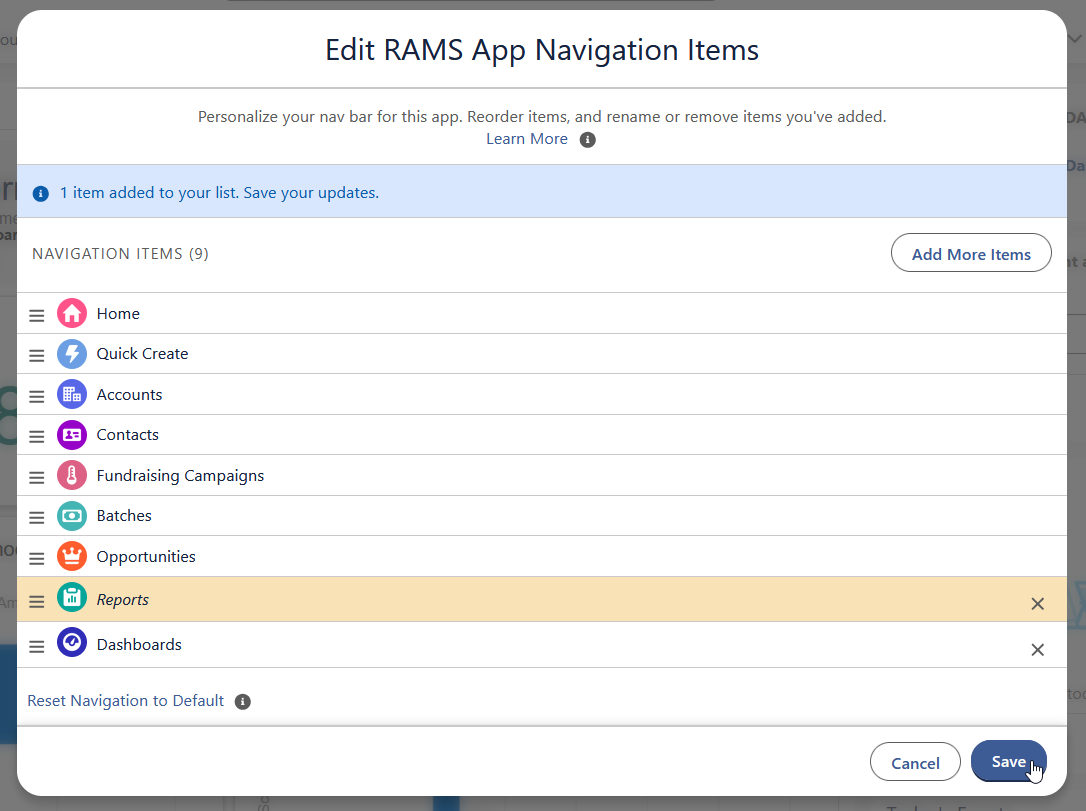
Editing the Nav Bar
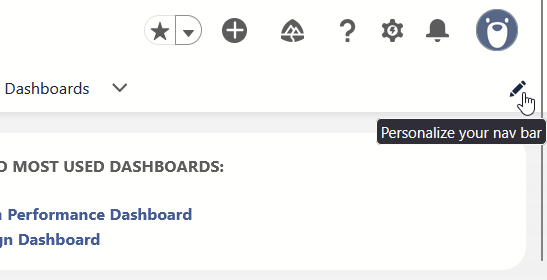
- Click
 at the top right corner and, in the next screen that will pop up, locate the, "Add More Items" button.
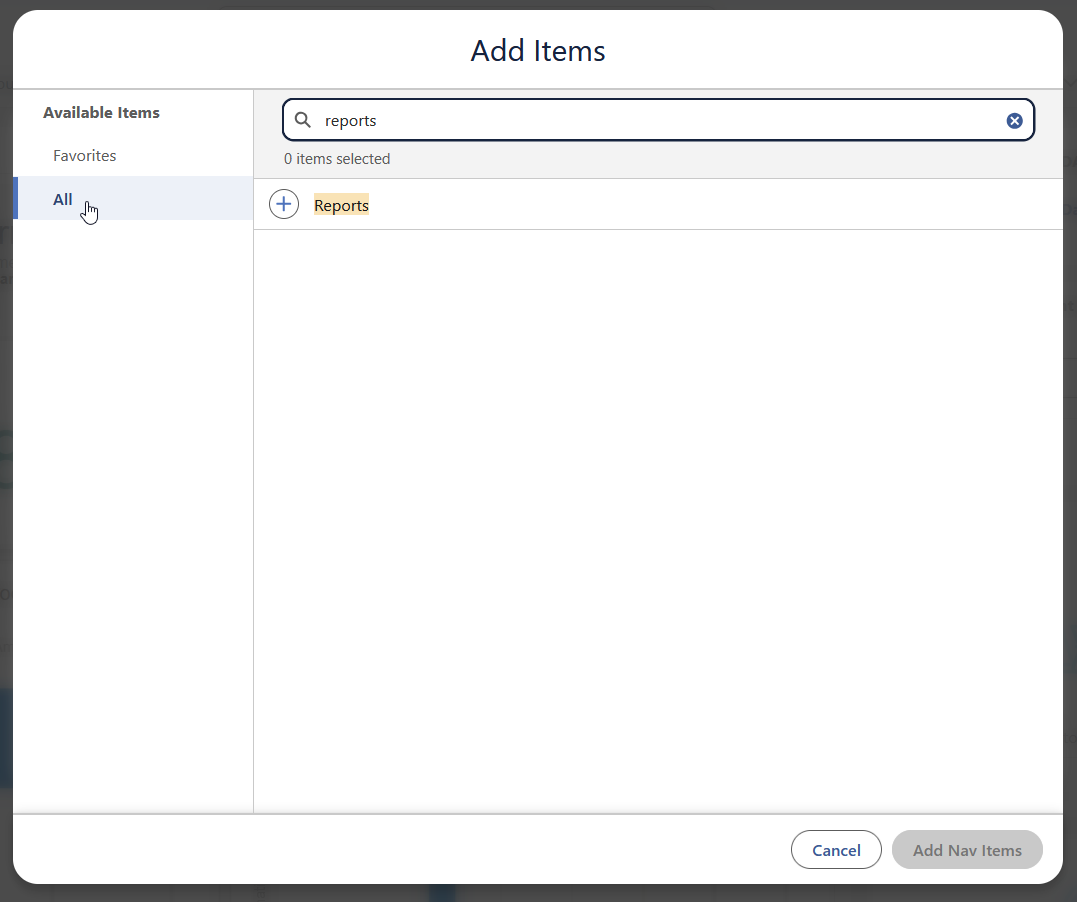
- On the next screen, click "All" in Available Items, then search for any pages, apps, or objects you want in your nav bar.
Click to select each item.
 - Click, "Add Nav Items" in the bottom right corner.
- Reorder your nav items by clicking and dragging the
 handles.
Your nav bar is only attached to your account, so feel free to customize it however you like.
Click, "Save" when you're finished.



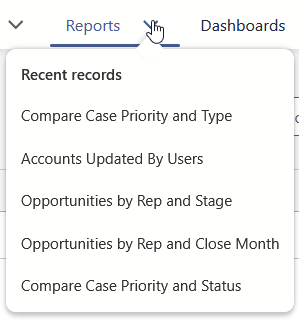
See your five most recently viewed reports by clicking the tab chevron.
Build First Report (Demo)
Guided exercise to show report-building skills with an example.
- STL
- Report Type
- Objects
- Fields
- Records
- Outline Tab
- Filter Tab
- Show Me
- Use smallest applicable date range
- Joined Report
- Group by a shared field (Joined)
- Fields Menu in Joined Reports
Build First Report (Definitions & Notes)
Basic skills to use on any report.
Summarize in Reports
Advanced Report Filtering
Filter Logic
By default, multiple filters on a report are combined with AND, meaning a record must match every filter to appear. Salesforce reporting provides more flexibility in report creation by allowing you to specify and give priority to certain filters using Filter Logic. Thus feature lets you control how filters combine, using AND, OR, and NOT, including parentheses for grouping
Adding Filter Logic
After you start making a report of any object type, you can start adding the desired filters to the report on the filter tab. Once at least two filters are added here, you can use the dropdown arrow at the top right of the left panel to select filter logic. 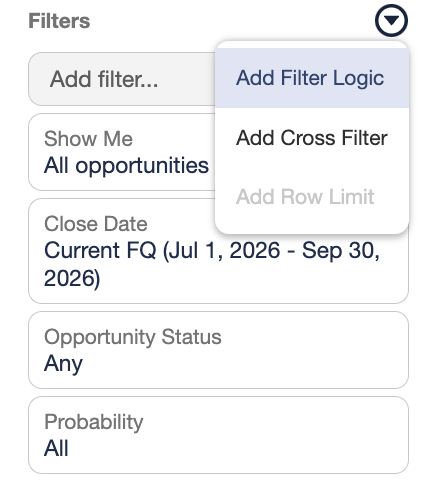
Filter Logic Formulas
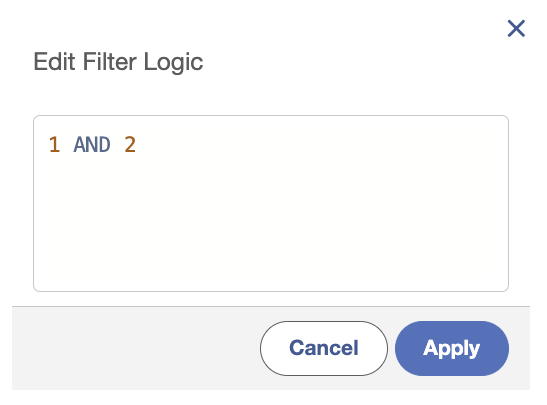
Once the filter logic menu is open you will see that the default value of "1 AND 2" will be shown. (If you have more filters those would be listed with AND as well). This is the logic that is usually applied in reporting, where all filters must apply to the record for it to be included in the report. Each added filter is automatically assigned a number based soon order added, this can be grouped in the formula using parentheses.
Accepted terms: AND, OR, NOT
| Example |
Record will show when: |
| 1 AND 2 | Both filter 1 and 2 apply. |
| 1 OR 2 | Either filter 1, filter 2, or both apply. |
| NOT(1) | Filter 1 does not apply. |
Cross Filters
Cross filter is another feature of salesforce reporting that allows you to filter a report based on the presence or absence of related child records. Unlike a standard filter, a Cross Filter does not let you display fields from the child object on the report, it only has the ability to determine whether the parent record qualifies.
Examples:
- Show accounts with attached opportunities
- Show accounts without contacts
Adding a Cross Filter
After you start making a report of any object type, you can add a cross filter by switching to the filters tab and using the dropdown menu to select "Add Cross Filter". This will open a menu allowing you to specify if you want to show records with or without a secondary object attached.
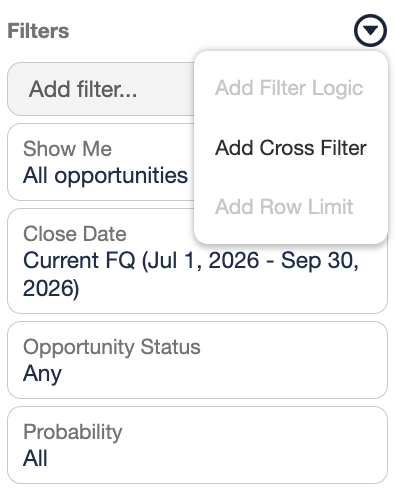
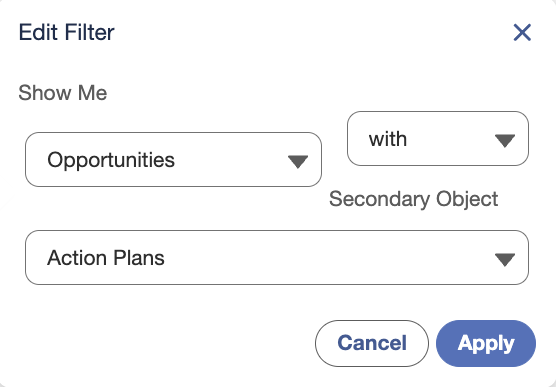
After applying the cross filter and running the report, you should see that the records not matching your cross filter are no longer appearing.
Lock Filters
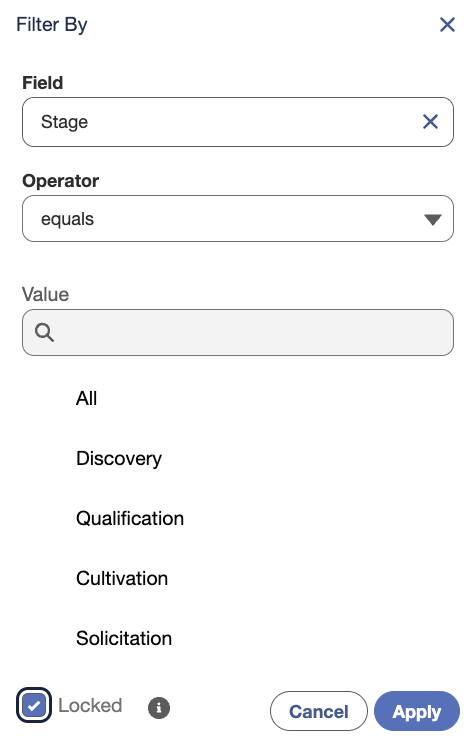
If you are planning on sharing a record with others, a useful security feature provided by salesforce is the ability to lock filters. Normally, anyone viewing a report can change the filter values on the run page, this can be prevented on more essential reports by simply checking the locked checkbox
How to Lock a Filter
Advanced Report Grouping
Advanced Report Formulas
Final Notes on Reporting
concepts that don't fit into any previous categories